How do I install a cutting blade?Updated a year ago
Follow the instructions below to install or remove your SINGER® MOMENTO™ cutting blades
Installing the Basic Blade Housing

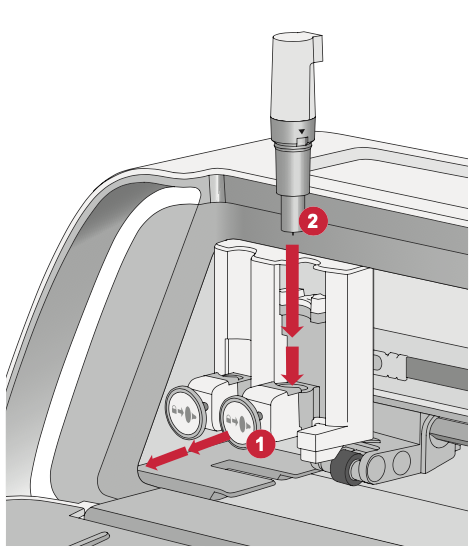
Steps to Install the Basic Blade with Housing
- Make sure the machine is powered on.
- Pull the locking mechanism out on the right hand side.
- Insert the Basic Blade housing into the right hand slot, ensuring that the groove on the blade lines up with the groove on the mechanism.
- When the blade appears to be seated properly, securely push the locking mechanism in.
- If you can move the blade, then it is not inserted properly. Check that the locking mechanism is properly aligned with the blade.
Pro Tip: If the blade does not light up, then it is not inserted properly. Check that the locking mechanism is properly aligned with the blade.
Steps to Remove the Basic Blade with Housing
- Pull the locking mechanism out and then remove the blade from the right hand slot.
NOTE: The Basic Blade and Deep Cut Blade have the same type of housing. To tell the difference between the blade types, you can make a label for it or use a marker or something similar to mark the housings to be able to tell the difference between the two.
Installing Rotary Blade with Housing

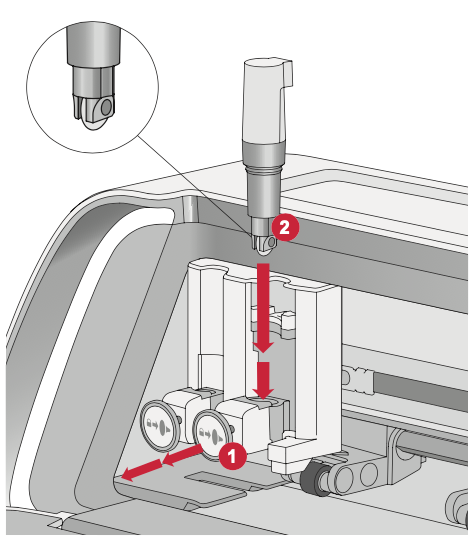
Steps to Install the Rotary Blade with Housing
- Make sure the machine is powered On.
- Pull the locking mechanism out on the right hand side.
- Insert the Rotary Blade with Housing into the right hand slot, ensure that the groove on the blade lines up with the groove on the mechanism. The Rotary housing has a unique connection socket. This helps the machine to recognize the specialty blade. Make sure the connector is securely seated in the socket opening located on top of the right hand slot in the dual tool holder.
- When the blade appears to be seated properly, securely push the mechanism back into place. The blade should light up if it is inserted correctly.
Pro Tip: If the blade does not light up, then it is not inserted properly. Check that the locking mechanism is properly aligned with the blade.
Pro Tip: When inserting a specialty blade or tool (the rotary blade, engraving tool, and debossing tool) the green light means that the blade is inserted into the socket properly but does not mean that the blade is locked in place. You will need to ensure that the blade is correctly inserted into the socket, as noted by the green light, and that the locking mechanism is pushed closed. You should hear and feel a distinct click, indicating that the mechanism is securely closed, and the blade is locked in place. If you don't hear or feel the click indicating proper locking, apply firm pressure to the locking mechanism. This extra push can help ensure that the mechanism is fully engaged and securely locks the blade in place. After pushing firmly, you can double-check to confirm that the blade is securely locked in place by gently pulling on the blade to ensure it isn't loose or can be pulled out.
